


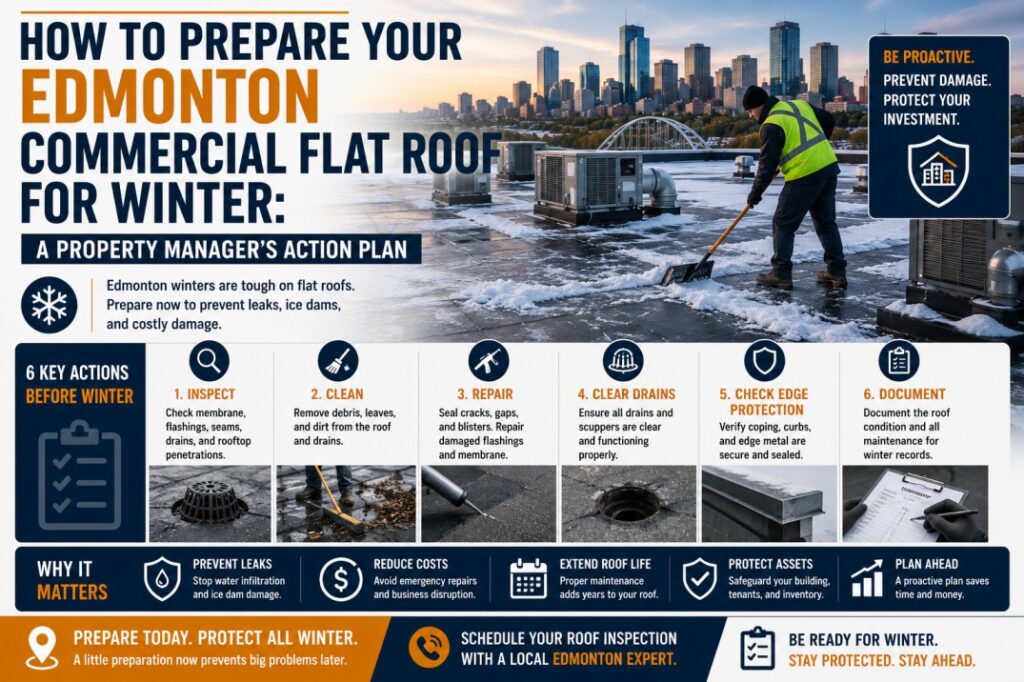
Edmonton’s commercial flat roofs don’t fail in January. They fail in January because of what wasn’t done in September and October.
Winter doesn’t create most commercial roof problems in Edmonton — it reveals them, amplifies them, and makes them significantly more expensive to fix. The frozen drain that floods a loading bay in February started as a partially blocked drain in October. The interior ceiling stain that appears in March began as a minor seam lift that freeze-thaw cycling worked on all winter. The insulation replacement project that costs $40,000 in April could have been a $600 drain repair and patch job in the fall.
Edmonton property managers who treat pre-winter roof preparation as a scheduled operational task — not a reactive emergency response — consistently avoid the scenarios above. Here is the complete action plan, organized by priority, for preparing a commercial flat roof for Edmonton’s winter.
Why Edmonton’s Winter Is a Different Threat Than Most Cities
Before the checklist, it helps to understand what Edmonton’s winter actually does to a commercial flat roof — because the mechanics explain why each preparation step matters.
Edmonton sits in Climate Zone 7A and experiences more than 200 freeze-thaw cycles annually. Each cycle is a mechanical stress event: water expands by approximately 9% when it freezes, and that expansion acts on every crack, seam imperfection, and drainage obstruction simultaneously. A single freeze-thaw cycle causes negligible damage. Two hundred of them, applied to the same vulnerable points all winter, cause progressive, compounding damage that becomes an expensive repair or replacement project by spring.
Edmonton’s winters also impose sustained snow loads on commercial flat roof decks — loads that can reach 40 to 60 kilograms per square metre during heavy snow events. Combined with any insulation degradation from moisture infiltration, that sustained load tests the structural capacity of aging roof decks in ways that warmer seasons never reveal.
The chinook effect is uniquely Edmonton. Rapid temperature swings of 15 to 25 degrees Celsius within 24 hours can occur multiple times per winter. Frozen drains that would remain stable through a steady -20°C winter become catastrophic when a chinook arrives, generating rapid snowmelt that has nowhere to drain. Every blocked drain on your commercial roof becomes a potential interior flood risk during chinook events.
Understanding these three mechanisms — freeze-thaw cycling, sustained snow load, and chinook-driven rapid melt — makes every step in this checklist not a maintenance box to check but a risk mitigation measure with a specific payoff.
The Complete Pre-Winter Checklist for Edmonton Commercial Flat Roofs
Step 1 — Clear Every Drain, Scupper, and Overflow Point
Do this first. Do this before anything else.
Every internal roof drain, secondary overflow drain, scupper opening, and downspout connection on your commercial flat roof must be cleared of debris before the first freeze. Leaves, gravel, bird nesting material, and general debris accumulate in drain sumps through summer and fall. Any drain that enters winter partially or fully blocked will freeze solid with the first hard frost and remain blocked until spring.
For each drain, physically remove all debris from the bowl and confirm water flows freely through the drain body. Check that drain clamping rings are secure and seated properly — freeze-thaw movement loosens drain assemblies over time. Confirm that secondary overflow drains are clear even if primary drains are functioning, because primary drains can freeze while overflow drains remain accessible.
Any drain that isn’t clearing water freely after cleaning needs professional assessment — the drain body itself may be damaged or the connecting pipe below may be partially blocked. This is a $200 to $500 repair in October. It is a significant interior water damage event in February.
Step 2 — Conduct a Full Membrane Inspection
Walk the entire roof surface and assess membrane condition across all sections. You are specifically looking for deficiencies that will be amplified by freeze-thaw cycling over the winter — because these are the ones where October repair timing is critical.
On SBS modified bitumen roofs, look for:
- Cap sheet blistering — raised bubbles in the membrane surface that haven’t opened yet. Blisters that don’t breach before winter will be worked on by freeze-thaw pressure from below all winter and frequently open by spring with much larger repair requirements.
- Seam edges that have begun to lift, particularly at lap joints near parapet walls and equipment curbs. A 2mm seam lift in October can become a 15mm open seam by April after 200 freeze-thaw cycles.
- Surface cracking or alligatoring in areas where the cap sheet has been UV-degraded. These surface cracks are winter water entry points.
- Any area where previous patch repairs have begun to separate at their edges.
On TPO and EPDM roofs, look for:
- Seam areas where membrane edges have separated or show lifting
- Any visible punctures or tears in the membrane field
- Adhesive bond failures at flashing terminations
- Membrane shrinkage pulling away from parapet wall details
Any deficiency identified at this stage should be repaired before freeze-up. Our commercial roof repair and maintenance service handles exactly this type of pre-winter deficiency work across Edmonton commercial buildings.
Step 3 — Inspect All Flashings at Penetrations and Parapet Walls
Flashings are the membrane details that transition from the flat roof surface to vertical surfaces — parapet walls, rooftop HVAC curbs, pipe penetrations, exhaust fan bases, skylights, and edge terminations. They are the most common source of commercial roof leaks in Edmonton and the most stressed components through freeze-thaw cycling.
Inspect every flashing detail for:
- Lifted or separated edges — where the flashing has pulled away from the vertical surface it was sealed against. Even a 2 to 3mm gap allows water to enter during rain events and ice to form during freeze-thaw cycling.
- Failed sealant — caulked joints at metal flashings and pipe collars that have weathered, cracked, or separated. Sealants typically have a 5 to 8 year service life before requiring replacement, and failed sealant is one of the most common sources of preventable winter roof leaks.
- Cracked counter-flashings — the metal cap details at the tops of wall flashings that prevent water from running behind the membrane. Metal counter-flashings expand and contract independently of membrane systems, and over time develop hairline cracks at their bends.
Failed sealant joints can be resealed in a single maintenance visit for minimal cost. Flashings that have fully separated require membrane repair. Either is dramatically less expensive before freeze-up than after it.
Step 4 — Assess Rooftop Mechanical Equipment and Condensate Lines
Every piece of rooftop equipment — HVAC units, exhaust fans, makeup air units, and RTUs — creates a penetration and potential water entry point that needs pre-winter assessment.
Check the membrane detailing around each equipment curb for lifting, separation, or deterioration. Confirm that equipment base flashings are fully adhered and sealed at all edges.
Specifically check condensate drain lines from rooftop HVAC units. These lines produce continuous condensate during heating season — and if they are directed onto the roof membrane rather than into a drain connection, they create persistent wet zones around equipment that freeze in winter and contribute to membrane deterioration and drain blockage. Condensate lines that are directing water onto the roof surface rather than to a drain should be addressed before the heating season begins.
Confirm that any rooftop equipment service panels can be accessed safely in winter conditions — this is relevant for your HVAC maintenance team’s access, and any access paths that cross the membrane should be confirmed to have walk pads installed and in good condition.
Step 5 — Check Roof Deck Structural Condition
This step requires professional assessment rather than visual observation from the roof surface — but it is worth flagging here because winter snow load is the stress condition that reveals deck problems.
If your commercial building has experienced any of the following, a professional structural assessment of the roof deck before winter is warranted:
- Visible deflection or springiness underfoot when walking the roof surface
- Interior ceiling areas that have shown water staining from previous winters
- Any known or suspected prior moisture infiltration into insulation below the membrane
- Buildings over 25 to 30 years old that haven’t had a documented deck assessment
A roof deck that is structurally degraded from moisture or age carries sustained winter snow loads differently than a sound deck. Professional assessment identifies these conditions before winter loading makes them critical.
Step 6 — Book Your Fall Professional Inspection
The steps above represent what property managers can assess and initiate themselves. The fall professional roof inspection conducted by a certified commercial roofing contractor goes further — and completes the pre-winter preparation process.
A professional fall inspection for Edmonton commercial flat roofs includes infrared moisture scanning to identify insulation saturation that isn’t visible from the surface, seam probe testing on SBS systems to verify adhesion quality, drain flow testing under controlled water application, and a written report with photographic documentation that serves as your maintenance record for warranty compliance and insurance purposes.
At Silverback Torch On Systems Ltd., our fall commercial roof inspection covers all of the above and delivers a prioritized repair list with timing recommendations — distinguishing between deficiencies that must be addressed before freeze-up and those that can be scheduled for spring without meaningful risk. This report becomes part of your building’s maintenance documentation, supporting warranty compliance, insurance assessments, and capital planning.
The Timing Window: Why September and October Matter
Edmonton’s average first freeze date is around October 20 to November 5 depending on the year — though early cold snaps can arrive in late September. Once temperatures consistently drop below zero, roofing repair work becomes more constrained: torch-on SBS application requires specific temperature conditions, sealant cure times extend, and adhesive applications have minimum temperature requirements.
This creates a firm practical window: roof preparation work for Edmonton commercial buildings should be completed by mid-October. Waiting until November for repair work identified in September is a material risk — the window may close before all deficiencies are addressed, and any unrepaired deficiency enters winter unprotected.
Property managers who schedule fall roof inspections in August or early September receive their reports with enough time to tender repair work, award contracts, and complete all deficiency repairs before the mid-October window closes. Property managers who call in October are often competing for contractor availability with everyone else who waited.
What Happens When Pre-Winter Preparation Is Skipped
The consequences of skipping pre-winter flat roof preparation on an Edmonton commercial building follow a predictable pattern.
Blocked drains freeze and remain blocked through winter. The first chinook event generates rapid snowmelt. Water ponds on the roof surface and finds every membrane vulnerability — seam lifts, blistered areas, failed flashing sealants. Water enters the insulation layer and freezes. Freeze-thaw cycling expands the damage through the winter. By spring, what started as three deficiencies addressable for $1,500 to $3,000 in September has become an insulation saturation problem requiring section replacement at $15,000 to $40,000 or more, depending on the extent of moisture infiltration.
This is not a worst-case scenario. It is the predictable outcome of known deficiencies meeting Edmonton’s 200-plus annual freeze-thaw cycles — and it happens on Edmonton commercial flat roofs every winter.
Take Action Before October
Silverback Torch On Systems Ltd. specializes in commercial flat roofing in Edmonton — including pre-winter inspections, deficiency repairs, drain servicing, and sealant maintenance for commercial and industrial buildings across Northern Alberta.
If your building’s last professional roof inspection was more than six months ago, or if you’ve noticed any of the warning signs described in this guide, the right time to act is before — not after — Edmonton’s first freeze.
Contact our Edmonton team to schedule your fall roof inspection and get a written assessment and prioritized repair recommendation before the October window closes.
Related reading for Edmonton commercial property owners: